How to Connect Linksys WiFi Extender to Router [Updated]
Connecting a Linksys WiFi range extender to a router can be an ordeal sometimes. If you are also finding yourself in a difficult situation because you don’t know the ABC of the connection process, we’ve got your back. This post will tell you about two methods to connect Linksys WiFi extender to router. The first method is the browser-based method whereas the second method is known as the WPS or Push-button method. Check out the following table to understand the basic difference between these two methods:
| Browser-based or Manual Method | WPS or Push-button Method |
|---|---|
| You need to access the web-based management utility of your WiFi range extender in order to finalize your connection with the router. The method also demands you to involve cables and PC in the setup and connection process. | This is a time-saving setup method that can make things happen in minutes. To complete the connection process via this approach, you just have to press the extender and router’s WPS buttons for a few seconds. |
Steps to Connect Linksys WiFi Extender to Router
From the above table, the WPS method seems easy-to-execute. Given that, let’s start the discussion with this method only. However, we would like to tell you that you won’t be able to connect your WiFi extender and the router if the extender isn’t working on default settings. To complete the connection, you need to reset your extender first. One more thing to know! After you are done with the setup process, you can use the Linksys Velop app(another name for Linksys app) to manage the home network settings. Can we start now?
1. Connecting Extender and Router via WPS
Place your WiFi extender and the main router in the same room before doing anything else. Please be sure that you are not placing your devices in a congested room. They will struggle communication otherwise. After that, follow the instructions that we are going to outline now.
- Plug in your Linksys extender and the router to working electrical sockets.
- Switch on the router first.
- After the router’s power light gains stability, switch on the extender.
- Turn to your extender and locate the WPS button on its side panel.
- Press the WPS button.
- Move to your router before 2 minutes get over. However, don’t rush!
- Press the router’s WPS button now.
- The WPS connection will be established.
Note: On some WPS-authorized routers, you won’t be able to find the physical WPS button. In that scenario, it seems impossible to connect Linksys WiFi extender to router. You just have to click the WPS option from its settings. However, this won’t work if you don’t own a WPS-supported WiFi router.
2. Connecting Linksys WiFi Extender to Router Manually
The manual method arrives as a boon for users who don’t have WPS-authorized routers. One can also go for the manual approach if he/she’s able to extend only one band of the router despite being dual-band. Here’s what you need to do in order to connect your extender and router manually:
- Using an Ethernet cable, you should first of all, hardwire your extender’s Internet port (the Yellow one) and the router’s LAN port. The LAN port needs to be active.
- Switch on the router (1st) and extender (2nd) in the same sequence as we’ve mentioned.
- On your computer, open WiFi Settings now and find the default network name (SSID) of your Linksys extender.
- The SSID and its respective WiFi password can be found on the extender’s label.
- Connect to the network.
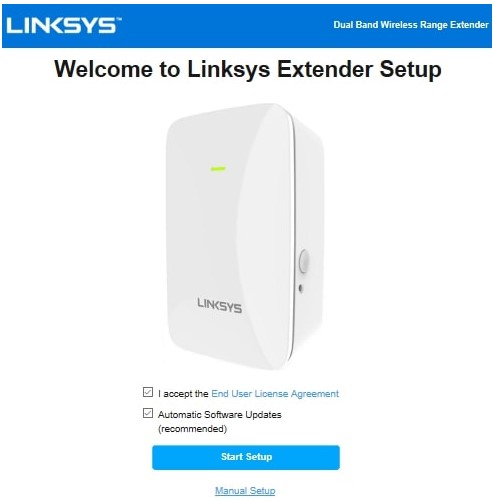
- Open a supported browser now and go to extender.linksys.com to open the Setup Wizard.
- The Setup Wizard can also be launched at 192.168.1.1.
- Read the End User License Agreement and select Start Setup.
- You will now be prompted to select the WiFi name you want to extend.
- Choose the network that your router broadcasts and input the Network Password.
- Click Next.
- The _Ext suffix will now get added to the network name. Let us say, if your SSID was Router previously, it will become Router_Ext.
- You can personalize these settings on the Extended Wireless Network Settings page.
- The Spot Finder window will now load and guide you regarding the extender’s placement.
- Click Back and set up the Linksys extender login password.
- Once done, register your Linksys extender on the Register Your Product portal.
- In case you’ve already done that, select Skip.
- A firmware checkup will happen now.
- Install the new firmware if available.
- You will soon come across the You’re Almost Done page that will display the extended network settings.
Note: You need to ensure that you’re entering the correct WiFi password of your host router. Else, no matter what you do, your extender and router won’t get connected.
The Conclusion
That’s all we had to say about how to connect Linksys WiFi extender to router. Here, you got to learn two completely different approaches that can help you connect your devices. It is now anticipated that you are all done and are accessing a super-fast WiFi speed in all the corners of your house.


