How to Setup Linksys Velop with Existing Router?
Linksys Velop mesh systems have nodes that create a unified WiFi network. Generally, the master node or the parent node connects to the modem and acts as a router. This means, the Velop system is meant to replace the existing router.
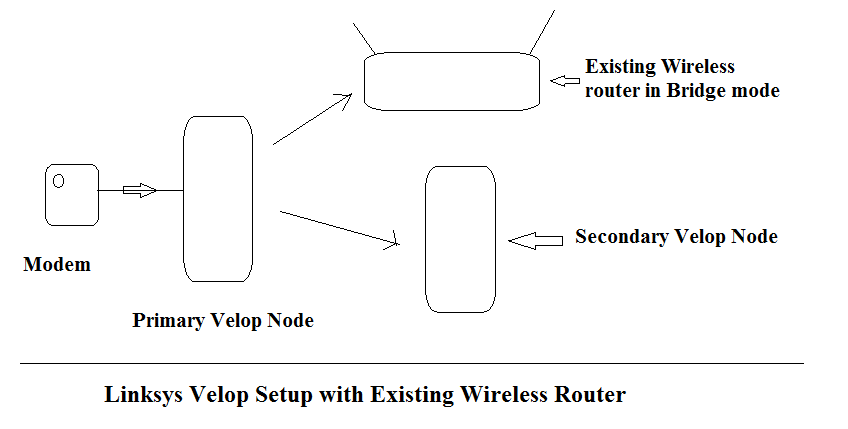
But, how will you setup Linksys Velop with existing router? Ever thought about making it possible? Well, there are chances that a double NAT situation will be created in this case because both the routers (your existing router and Linksys Velop parent node) will create their separate WiFi networks. The best solution in this case will be to disable WiFi on one of the routers. That can be done if you:
- Set up Velop in bridge mode
- Disable the WiFi on the first router and set up the Velop mesh system in an ordinary way
Methods to Set Up Velop with Existing Router
Setting Up Velop in Bridge Mode
Performing Linksys Velop setup in the Bridge mode will allow you to connect the router to your mesh Velop using a wired source (Ethernet cable). The steps given below can help you install the Velop in the Bridge mode:
- Switch on the Velop node (master node) after placing it in the range of the existing router.
- Let the node’s top light glow purple which means it is ready for installation in the Bridge mode.
- Now, launch the Linksys application on the mobile phone that is connected to your Velop router’s network.
- Using the Linksys cloud account details, log in to the app.
- Choose Velop from the list of products to be installed.
- Go through the on-screen instructions now and set up the Velop.
- After that, tap Menu > Advanced Settings > Internet Settings.
- Go to Connection Type.
- Choose Bridge Node.
- Tap the Save option.
- Tap Enable Bridge Mode.
This is how you can set up the Velop with the existing router. Know that the devices connected to Velop system will disconnect until the complete changes get applied. The dashboard of the Velop app will display that the network is now working in the Bridge mode. Know that now you need to join the main router and your master node using an Ethernet cable. The same steps can be followed if you want to enable the Bridge mode using the linksyssmartwifi.com URL.
Disabling WiFi on Main Router
If you disable the WiFi function on the first i.e. the main router, then you can easily use the Linksys Velop mesh system with the existing router. Here are the easy steps that should be followed to install your Linksys mesh system:
- First of all, access the web GUI of your existing router and disable its WiFi function.
- After saving the changes of the first router, bring the master node of the Velop in the same room as the router.
- Switch on the node and let it glow purple.
- Launch the Linksys app now.
- First time users should create a Linksys account and log in.
- The app will now ask you whether the node is switched on and is glowing purple.
- If prompted, turn on the Bluetooth function on your mobile phone.
- Follow the in-app instructions for the Velop setup.
- When the page displays the final setup settings, you are suggested to add more nodes and place them accordingly so that whole home can be filled with a stable internet connection.
The Conclusion
The blog consisting of the instructions revealing how to setup Linksys Velop with existing router ends up here. Hopefully, with the help of the information provided in this post, you will be able to set up the Velop successfully.


