Linksys Velop AX4200 Setup and Login
Got your hands on the Velop AX4200 mesh WiFi system brought in by Linksys and now looking for instructions to set it up? We’ve got you covered. FYI, you can complete the Linksys Velop AX4200 setup using two methods. The first one demands you to access the web-based management panel on a PC whereas the other needs you to install a mobile application named Linksys Velop. Click on the links given below to learn the installation steps through the mobile app or PC.
Basic Preparation for Velop Installation
Initiating the setup process will become a lot easier for you if you are ready with the basics. Therefore, before setup, you are suggested to bring all your nodes (to be installed) into the same room as your host gateway. In addition to that, if you are planning to replace your existing WiFi router with the Velop node, you must do it at this instant only. In case there is an already installed mesh WiFi system in your house, you are required to remove its all units from the home network. After that, power cycle your modem and let it reboot. Once done, proceed with the Linksys Velop setup.
Linksys Velop AX4200 Installation and Login via Mobile
You can perform the AX4200 setup on Android as well as iOS devices. For this, you first need to download the Linksys mobile application through the respective application store of your device. Once done, go through the steps given below for the mesh WiFi system configuration:
Things You Should Know!
There are various hardware units present in the Linksys Velop AX4200 mesh WiFi system. All these hardware units are known as nodes. The one you connect directly to the host gateway (generally modem) starts acting as the router. You can also call it the Parent node or the Primary node. It means all other nodes will become Secondary or Child nodes.
- Connect one of the nodes to the main modem directly and power it up.
- The connection is supposed to be made with the aid of an Ethernet cable.
- Keep in mind that the port chosen on the Velop node will become the dedicated Internet port.
- Time to power on your Child nodes! Be sure that all your nodes are in the same room.
- Now, connect your mobile phone to the WiFi network of your Linksys AX4200 Velop.
- Load the Linksys app and select SET UP A NEW WIFI NETWORK.
- Choose VELOP AND MESH ROUTERS.
- Turn on BLUETOOTH if prompted and follow on-screen prompts.
- Verify in the app whether all your nodes are powered on or not.
- Follow a few on-screen instructions and let your node check for the internet connection.
- Customize the WiFi name and Password.
- Tap CONTINUE.
- Log in with a Linksys Cloud account or tap CREATE ACCOUNT.
- Let your Child Nodes get configured and follow the on-screen instructions.
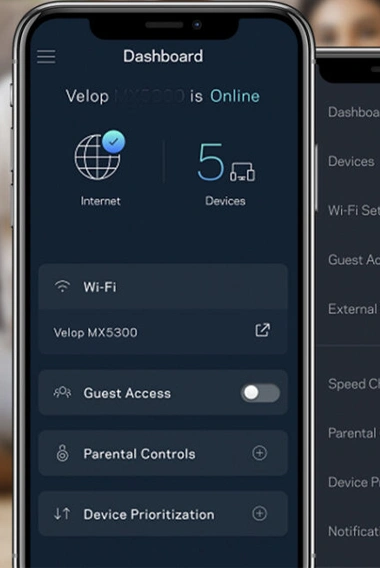
- As soon as you see the HOMEWIFI IS READY screen, tap GO TO DASHBOARD.
- You can now place your nodes in the area where no WiFi connection is there.

How to Set Up Linksys Velop AX4200 on PC?
Setting up the Velop mesh WiFi system through the mobile application might become difficult sometimes especially when the Linksys app is not working. In that case, users can opt for a PC to complete the configuration of the Velop mesh network. The steps given in the next section will help you set up all your Linksys nodes by accessing the linksyssmartwifi.com login URL on an internet browser via PC.
Connecting PC and Velop Router is Important!
Before you initiate the setup process by accessing the login URL on the browser, you are suggested to connect your PC to the Velop router. You can do so either with the help of WiFi Utility or through an Ethernet cable. The choice is all yours! But, if you opt for a WiFi connection, check the node’s label for the SSID and password and use them correctly. However, if you are using the Ethernet cable, be sure to pick a non-damaged one.
- We are assuming that you’ve already made the required connections and your nodes are powered up.
- Go to the web browser on your PC right away and enter 192.168.1.1 or linksyssmartwifi.com into the address bar.
- In case you get an error message saying ‘THE CONNECTION IS NOT PRIVATE’, click ADVANCED and proceed.
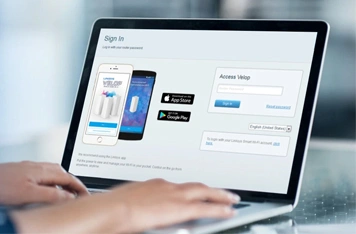
- Click on the mobile image on the next screen. For faster results, try to click the “L” icon on that mobile phone.
- Input “admin” as the default admin password and hit Sign In.
- If your Linksys Velop AX4200 doesn’t accept the password, check its user manual to know the correct value of the password.
- Click the CA link and choose CONNECTIVITY.
- Hit CA ROUTER SETUP.
- Create the WIFI NAME and SSID for your Velop nodes and apply the changes.
- The screen will flash the YOUR MASTER NODE IS NOW CONFIGURED message.
- Input the INTERNET SETTINGS from your ISP.
- Click ADD WIRELESS CHILD NODES (if there are any).
- Move to the BASIC tab.
- Your WiFi is now ready!
Completing the Velop AX4200 Login Process
After the setup process of your Velop AX4200 system, you might need to log in to it to make amendments to its settings. You can take the help of the web browser for the same if the Linksys app is not working for you. Here’s how:
- On a computer connected to the Velop system, visit linksyssmartwifi.com.
- You will soon see the admin window of the Linksys Velop router.
- Input the password and click Sign In.
- The login process completes!
This is how you can log in to your Linksys Velop AX4200 mesh system after the setup process. Feel free to manage and monitor the home network now!

