How to Configure Linksys Routers Manually [General Guide]
Not everyone is smart enough to set up a Linksys smart WiFi router with the aid of a mobile phone. There are some users who are technically challenged and are unable to understand the instructions appearing on the dashboard of the router app for Linksys router setup using Phone. They need simplified and step-by-step instructions to configure Linksys routers. Are you also among those users? Worry not! The option to set up a Linksys smart router manually is also there. It does not require you to make use of a mobile application.
What Does Linksys Router Manual Setup Mean?
Prior to learning the instructions about configuring the router using manual steps, it is essential that you get a brief introduction of the process. If we say it in simple words, then it is the process in which you access the Linksys login IP or web URL manually and configure every setting manually by yourself including the WiFi SSID, password, admin password, security protocols, etc.
Basic Requirements to Configure Linksys Routers
- Be very sure that you have access to a well-working/sound internet connection.
- If there is already a router present in your home network and that too is connected to the host modem of your Linksys router, it is advised that you remove and unplug the existing router. It needs to be done when you have swapped the older router with the one from Linksys.
- Take note of the default SSID and WiFi password of your Linksys smart WiFi router. These values are generally written on the router’s label that is located at its bottom.
How to Configure Linksys Routers Manually?
Here are the steps that you can follow to configure Linksys routers manually. Before that, you need to power on the modem and run an Ethernet cable from its LAN port to the Internet port of your Linksys router. Once done, follow these instructions:
- Connect the router’s respective power adapter and then plug it into a working outlet.
- The Power light of your router will become solid blue.
- Now, switch on your laptop/desktop and connect it to the default WiFi name of your Linksys smart WiFi router.
- Time to load the default web browser!
- Be it Google Chrome or Microsoft Edge, just make sure that you are making use of the latest stable version.
- Move to the address bar right away and type http://192.168.1.1 or linksyssmartwifi.com.
- In case you are attempting to configure a general series of Linksys router, use the address myrouter.local.
- Upon pressing Enter, you will be greeted by the “Let’s Get Started” screen.
- Here, you need to accept the terms and conditions by clicking the check box.
- Once done, click Next.
- You’ll have to click the Close button in order to exit the setup wizard.
- Now, a login window will show up where you have to input the router’s factory set password.
- The factory-set password value is admin (in lowercase).
- Now, you have to manually configure the router settings.
- For that, select Configuration.
- Go to the WiFi tab and expand the menu.
- Select Basic Wireless Settings.
- Customize the Wireless settings for the 2.4 GHz as well as the 5 GHz frequency band and hit Save.
- Return to the router’s dashboard and go to Wireless Security settings tab via the path Configuration > WiFi > Wireless Security.
- You are now required to customize the WiFi passwords for both frequency bands.
- Click Save once you are done.
- Loss of WiFi connection will take place again.
- Reconnect your computer.
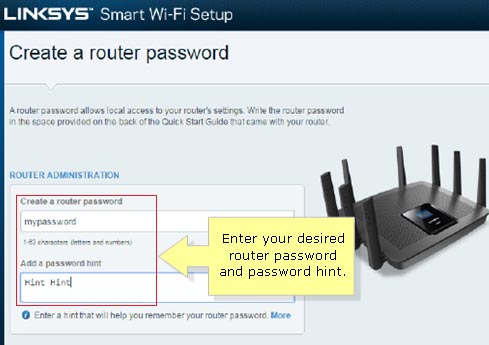
- Set the Linksys router login password for your router after accessing the dashboard.
- In case the router’s Internet LED does not become blue, configure the Internet settings.
- For this, click Configuration > Connectivity > WAN Setup.
- Input the required settings and click Save.
- The Linksys router manual configuration is done now.
The Conclusion
Our guide explaining how to configure Linksys routers manually ends here. We hope that after you follow the above-given instructions very carefully, nothing can stop you from making your router up and running. Now, all you have to do is connect your client devices to the network that you have just created.
Know that if you are using a DHCP connection, you do not have to input any settings at the final stage of the setup process. The only thing you have to do is power cycle the modem and wait for the light on your router to go solid blue.


